Introduction:
Potentiometers are versatile devices commonly used in electronics to control the voltage or current of a circuit. In this article, we will explore how to use a potentiometer to control the brightness of an LED using pulse width modulation (PWM) on an Arduino board. By the end of this tutorial, you will be able to adjust the brightness of an LED using a simple potentiometer.
Materials:
- Arduino board (UNO or similar)
- Breadboard
- Jumper wires
- Potentiometer (10k ohm)
- LED
- Resistor (220 ohm)
Instructions:

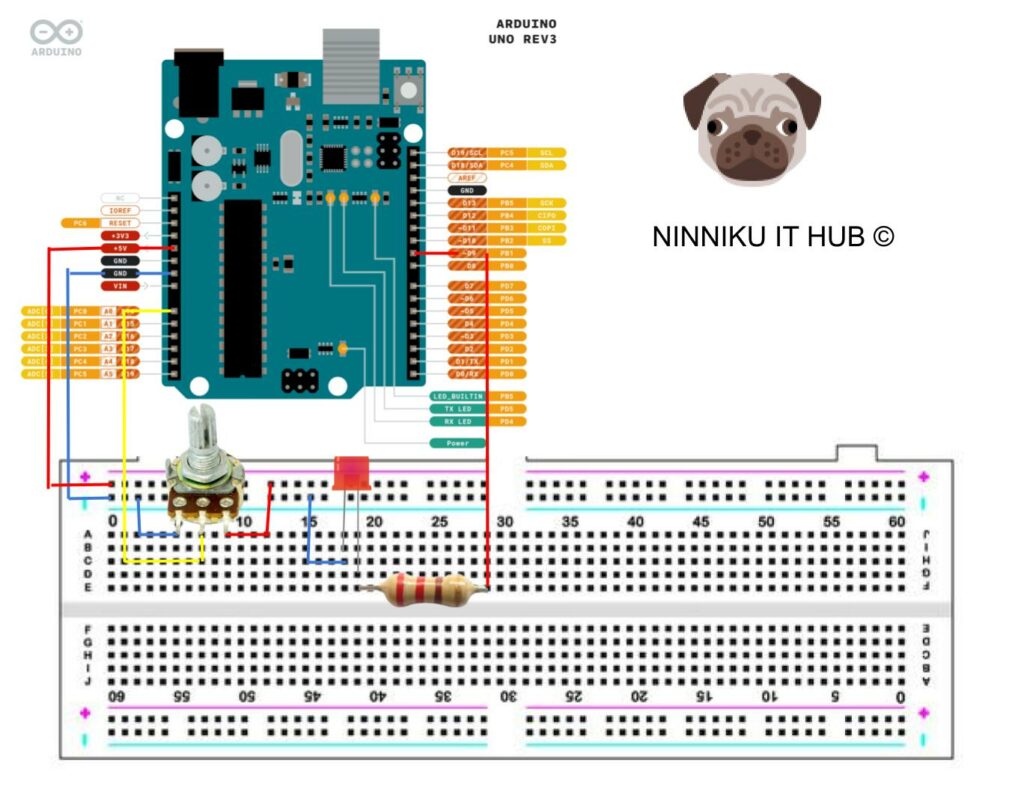
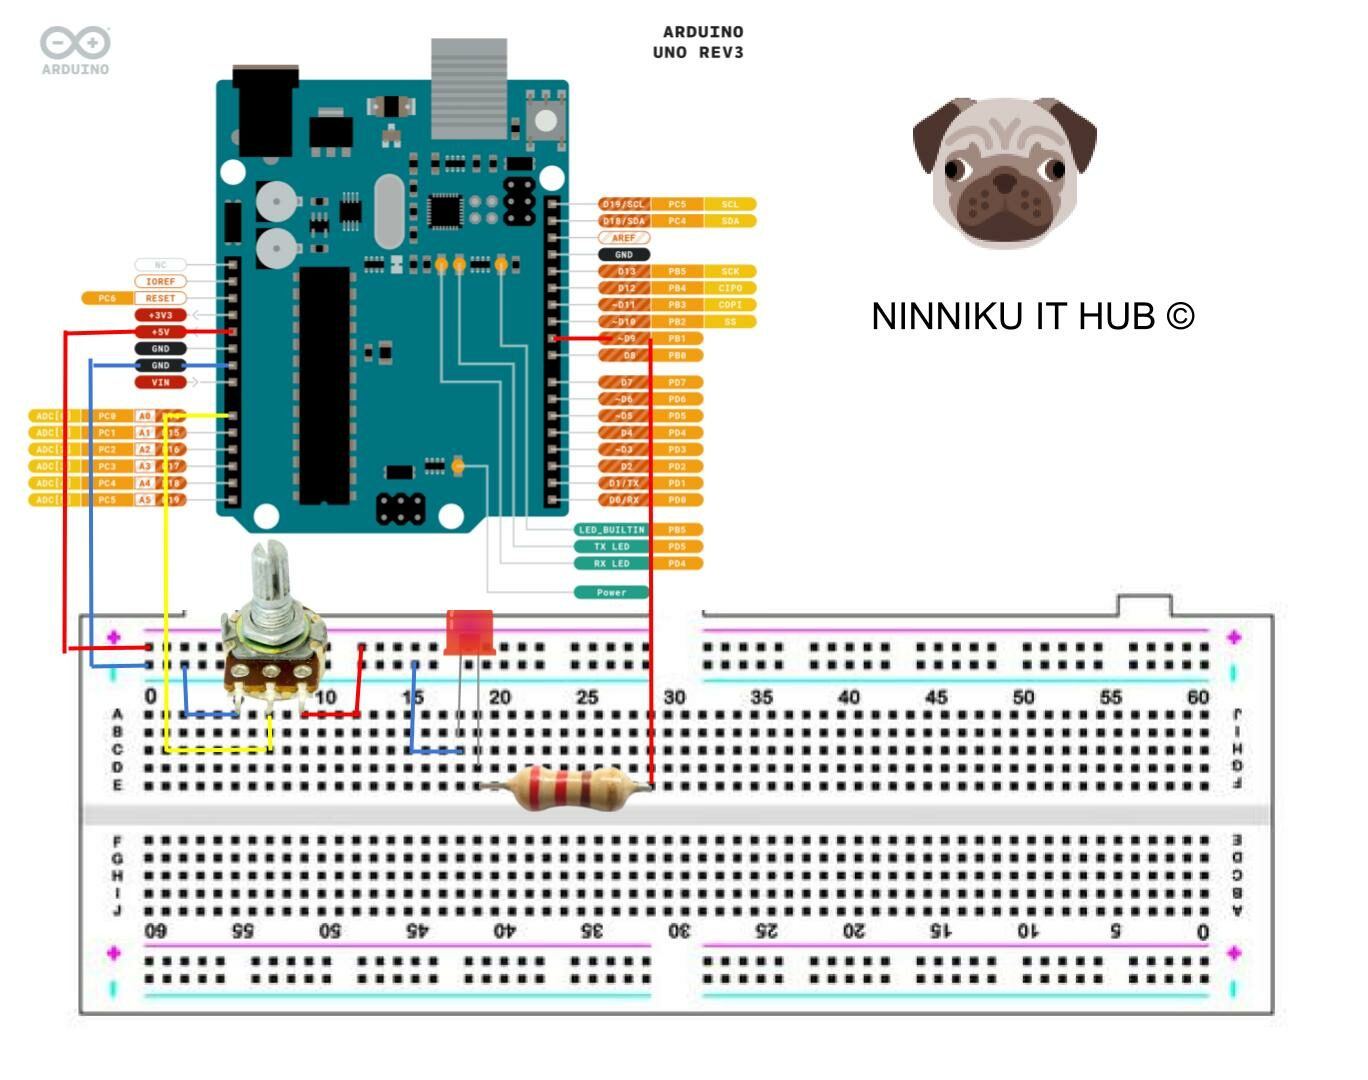
- Connect the potentiometer to the breadboard. The potentiometer should have three pins: the left pin, the right pin, and the middle pin (also called the wiper). Connect the left pin to ground and the right pin to 5V on the Arduino board. Connect the middle pin to analog input pin A0 on the Arduino board.
- Connect the LED to the breadboard. Connect the longer leg of the LED to a digital pin on the Arduino board (we will use pin 9 in this tutorial) through a 220 ohm resistor. Connect the shorter leg of the LED to ground.
- Upload the following code to the Arduino board:
int potPin = A0;     // analog input pin A0
int ledPin = 9;      // digital output pin 9
int brightness = 0;  // current brightness of the LED
int time = 0;
void setup() {
  Serial.begin(9600);
  pinMode(ledPin, OUTPUT);  // set the LED pin as output
}

void loop() {
  int potVal = analogRead(potPin);            // read the potentiometer value (0-1023)
  brightness = map(potVal, 0, 1023, 0, 255);  // map the potentiometer value to 0-255
  analogWrite(ledPin, brightness);            // set the LED brightness using PWM
  //
  if (time > 1000) {
    Serial.print("Potentiometer value: ");  // Print potentiometer value
    Serial.print(potVal);
    Serial.print("\tLED brightness: ");  // Print LED brightness value
    Serial.println(brightness);
    time = 0;
  }
   time++;
}- Open the Serial Monitor in the Arduino IDE and set the baud rate to 9600. You should see the current potentiometer value and LED brightness printed on the Serial Monitor.
- Turn the potentiometer knob and observe the changes in LED brightness. The brightness should increase as you turn the knob to the right, and decrease as you turn it to the left.
Conclusion:
Controlling the brightness of an LED using a potentiometer and PWM on an Arduino board is a simple yet effective way to introduce yourself to the world of electronics. By understanding the principles behind PWM and how to use a potentiometer, you can create more advanced projects that involve controlling the speed of motors, the volume of speakers, and more.

[…] Shine Bright with Potentiometer: Controlling LED Brightness with PWM on Arduino ArduinoPotentiometerRaspberry PI By Ray (System Analyst) 0 Comments […]