Before installing WordPress on Raspberry Pi, you may want to know about its advantages and disadvantages. You can refer to the following post.
This guide will teach you how to quickly make an Ubuntu Operation System SD card, boot it on Raspberry Pi 4, and set up the WordPress server.
Preparation
- A microSD card ( 32GB to 128GB)
- A computer with a microSD card drive
- A Raspberry Pi 4 B ( 4G or 8G Ram)
- A USB-C power cable
- A Wi-Fi network or an ethernet cable with an internet connection
Optionally:
- A monitor with an HDMI interface
- An HDMI cable for the Pi 2 & 3 and a micro HDMI cable for the Pi 4
- A USB keyboard
Prepare the SD Card
Download Raspberry Imager from the raspberry pi official website.
Windows:
https://downloads.raspberrypi.org/imager/imager_latest.exe
MacOS:
https://downloads.raspberrypi.org/imager/imager_latest.dmg
Ubuntu:
https://downloads.raspberrypi.org/imager/imager_latest_amd64.deb
I use MacOS to demonstrate.
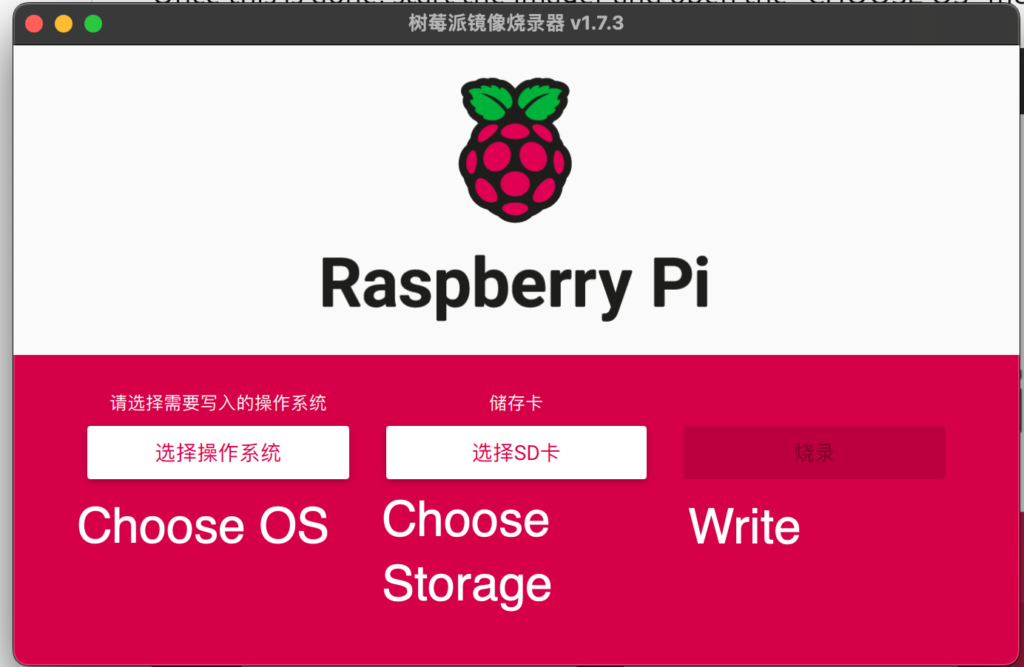
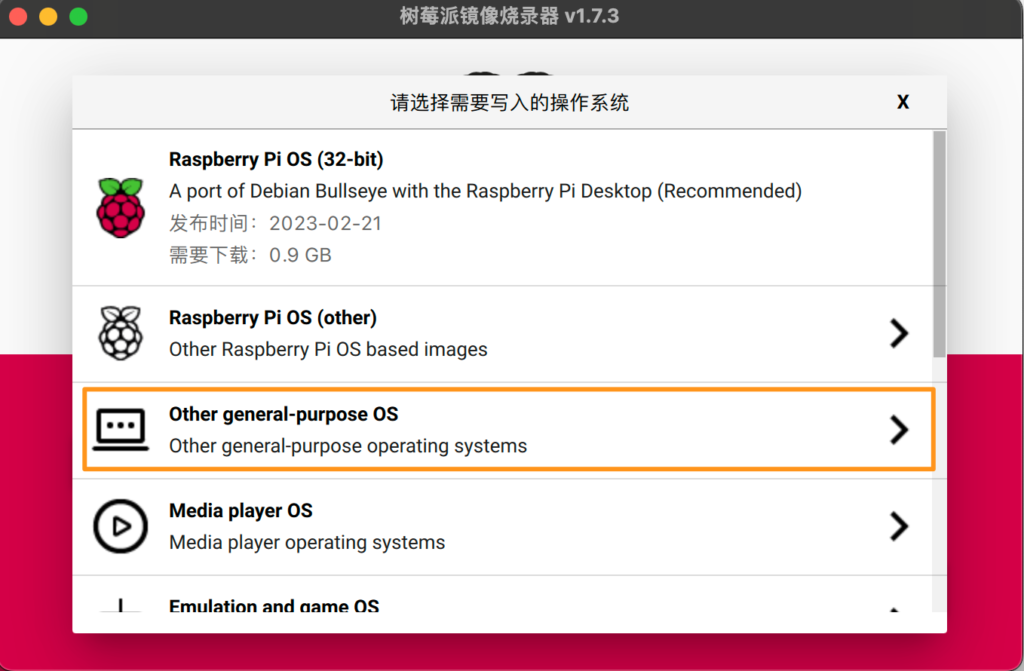
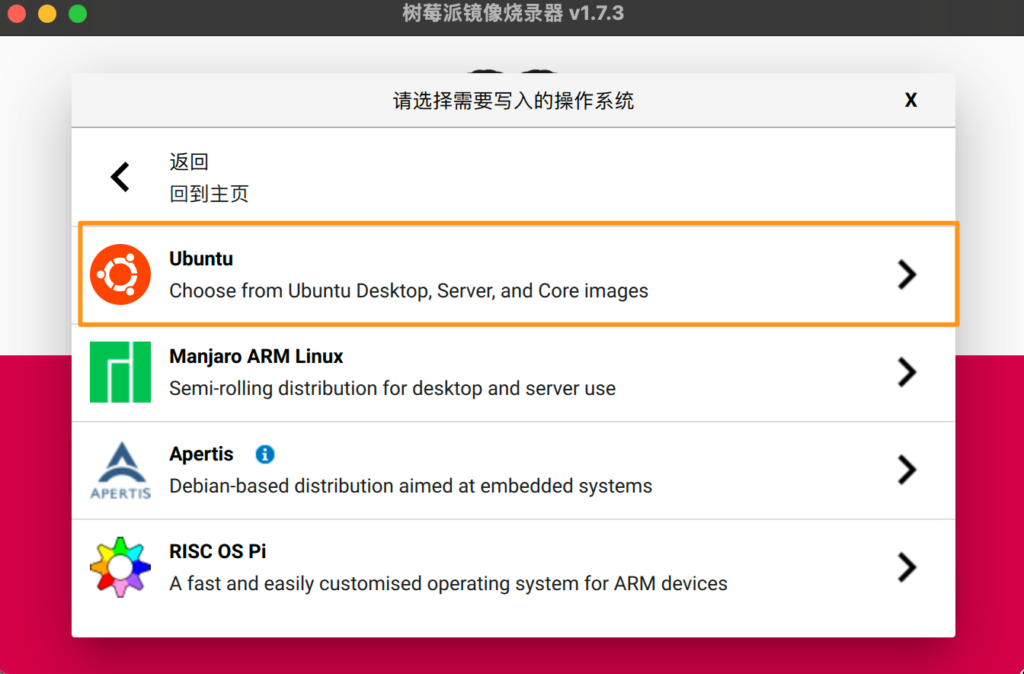
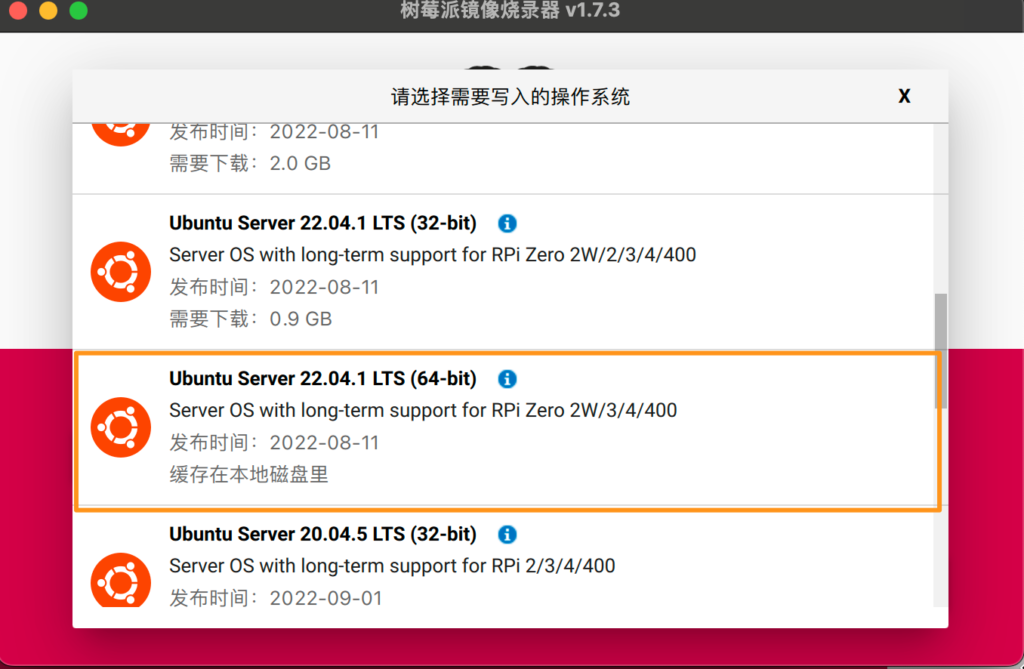
Setting Your Linux Account Password: An Important Step.
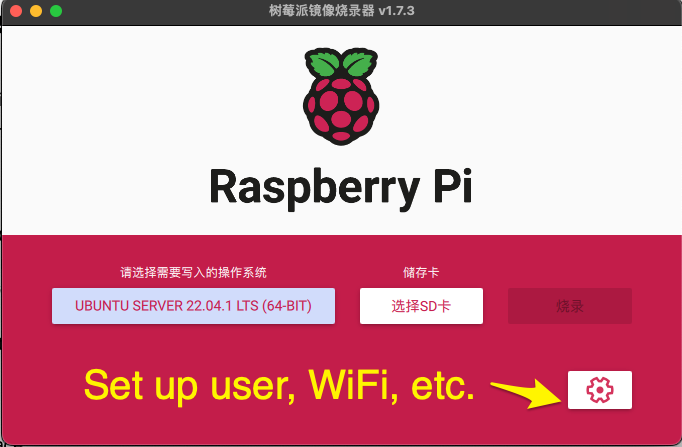
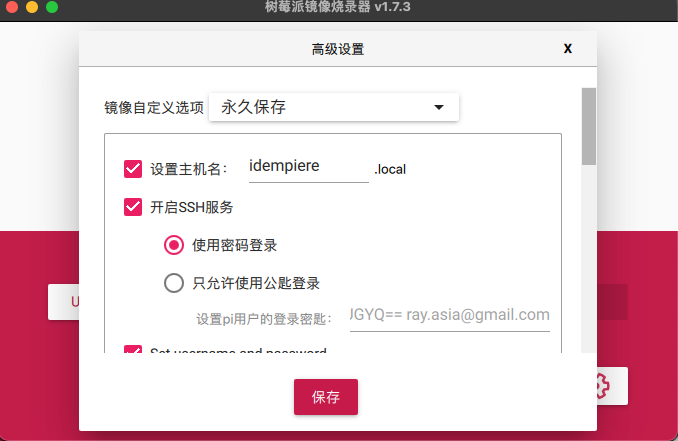
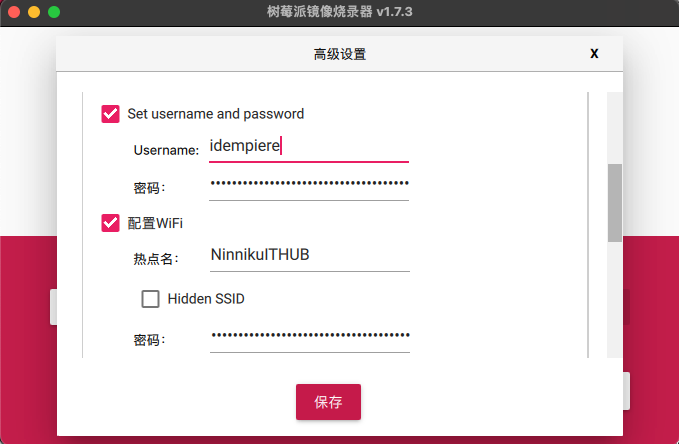
Once it’s set, you can grill it
Connect to Raspberry Pi 4
After the Raspberry Pi has been booted, you can connect to it using Secure Shell (SSH).
If you don’t know the IP address of your Raspberry Pi, you can use a network scanner tool like “Angry IP Scanner” or “Advanced IP Scanner” to scan your network and find the IP address of your Raspberry Pi. Once you have the IP address, you can use an SSH client like PuTTY (Windows OS Only) to connect to your Raspberry Pi. Alternatively, you can connect your Raspberry Pi to a monitor and keyboard and use the command “ifconfig” in the terminal to display its IP address.
