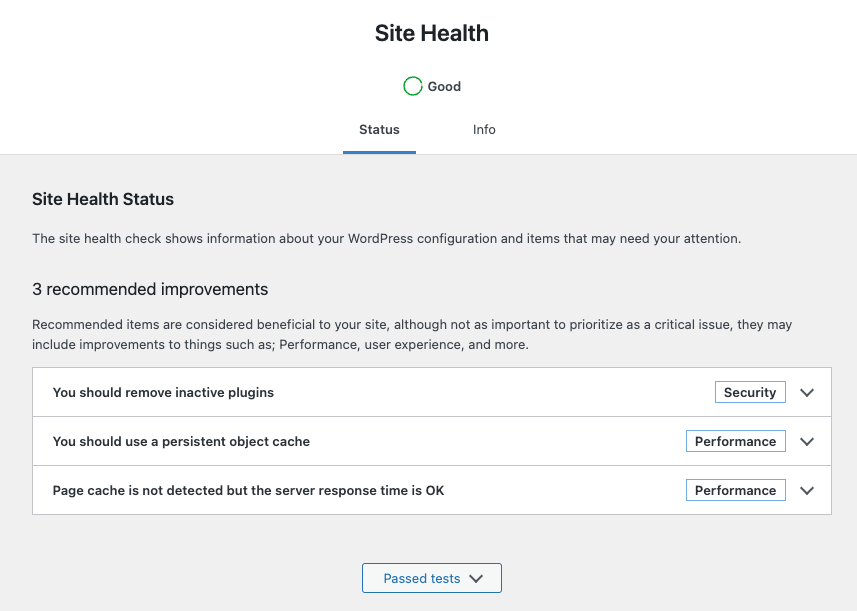
You should use a persistent object cache performance
Tools > Site Health: It has recommended improvements.
A persistent object cache makes your site’s database more efficient, resulting in faster load times because WordPress can retrieve your site’s content and settings much more quickly.
Your hosting provider can tell you if a persistent object cache can be enabled on your site
Take Unbuntu as an example
Install Memcached on Ubuntu by following these steps:
Open your terminal and update your package list by running the command:
sudo apt updateInstall Memcached by running the command:
sudo apt install memcachedOnce Memcached is installed, you can verify its status by running the command:
sudo systemctl status memcached
If Memcached is not running, start it by running the command:
sudo systemctl start memcachedBy default, Memcached listens on localhost on port 11211. To configure Memcached, you can edit the configuration file located at /etc/memcached.conf.
To test Memcached, you can install the php-memcached extension by running the command:
sudo apt install php-memcached
# follow your php version
sudo apt install php7.4-memcached
Once the extension is installed, create a PHP script with the following code:
<?php
$m = new Memcached();
$m->addServer('localhost', 11211);

$result = $m->get('test_key');
if ($result) {
    echo $result;
} else {
    echo 'No data found in cache. Adding some data now...';
    $m->set('test_key', 'Hello, world!', 10);
}
This code creates a new Memcached instance, adds a server at localhost:11211, and attempts to retrieve a value with the key test_key. If the value is found, it is printed. Otherwise, a message is printed and a value is added to the cache with the key test_key.
Run the PHP script by running the command:
php script.phpIf Memcached is working correctly, you should see the message “No data found in the cache. Adding some data now…” and the value “Hello, world!” should be added to the cache.
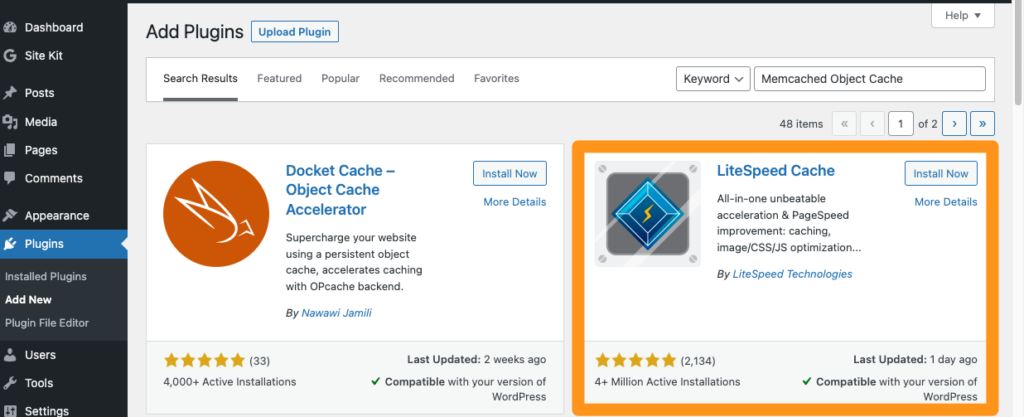
Now we can install plug-ins for WordPress
Search for Memcached Object Cache in the plug-in interface
For example, let’s take the installation of LiteSpeed Cache.
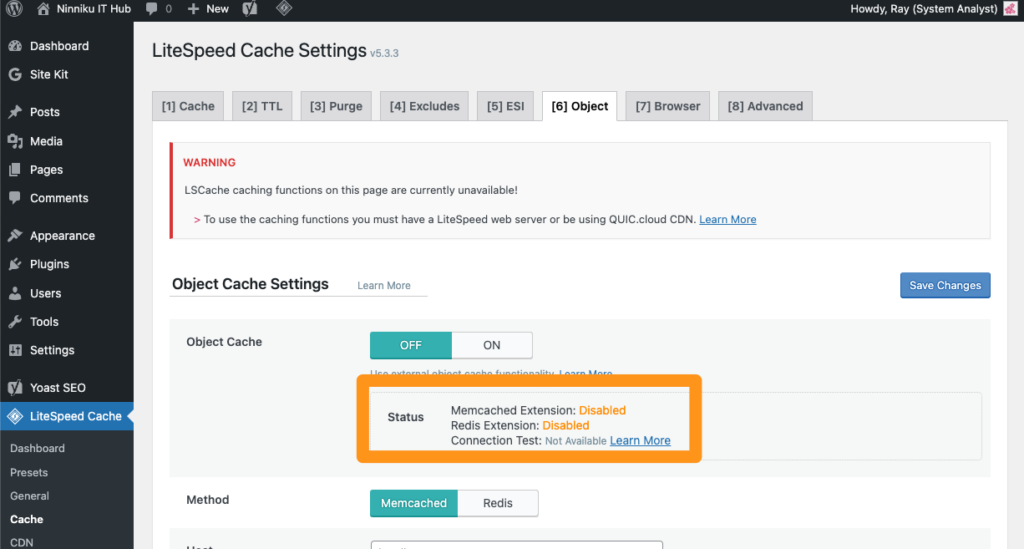
Remember to restart the apache2 service.
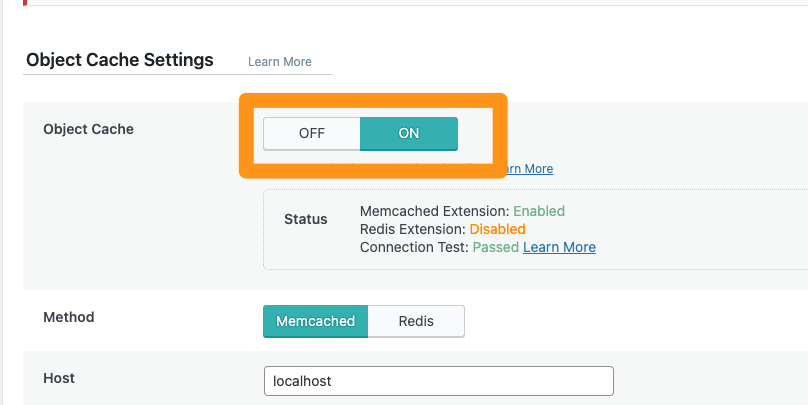
sudo apache2ctl restartTurning it ON is now possible.
English Version
You should use a persistent object cache performance
Tools > Site Health: It has recommended improvements.
A persistent object cache makes your site’s database more efficient, resulting in faster load times because WordPress can retrieve your site’s content and settings much more quickly.
Your hosting provider can tell you if a persistent object cache can be enabled on your site
Take Unbuntu as an example
Install Memcached on Ubuntu by following these steps:
Open your terminal and update your package list by running the command:
sudo apt updateInstall Memcached by running the command:
sudo apt install memcachedOnce Memcached is installed, you can verify its status by running the command:
sudo systemctl status memcached
If Memcached is not running, start it by running the command:
sudo systemctl start memcachedBy default, Memcached listens on localhost on port 11211. To configure Memcached, you can edit the configuration file located at /etc/memcached.conf.
To test Memcached, you can install the php-memcached extension by running the command:
sudo apt install php-memcached
# follow your php version
sudo apt install php7.4-memcached
Once the extension is installed, create a PHP script with the following code:
<?php
$m = new Memcached();
$m->addServer('localhost', 11211);

$result = $m->get('test_key');
if ($result) {
    echo $result;
} else {
    echo 'No data found in cache. Adding some data now...';
    $m->set('test_key', 'Hello, world!', 10);
}
This code creates a new Memcached instance, adds a server at localhost:11211, and attempts to retrieve a value with the key test_key. If the value is found, it is printed. Otherwise, a message is printed and a value is added to the cache with the key test_key.
Run the PHP script by running the command:
php script.phpIf Memcached is working correctly, you should see the message “No data found in the cache. Adding some data now…” and the value “Hello, world!” should be added to the cache.
Now we can install plug-ins for WordPress
Search for Memcached Object Cache in the plug-in interface
For example, let’s take the installation of LiteSpeed Cache.
Remember to restart the apache2 service.
sudo apache2ctl restartTurning it ON is now possible.
日本語版
永続的オブジェクトキャッシュの使用を推奨します
ツール > サイトヘルス:改善の推奨事項があります。
永続的オブジェクトキャッシュを使用すると、サイトのデータベースがより効率的になり、WordPressがサイトのコンテンツと設定をより迅速に取得できるため、読み込み時間が短縮されます。
ホスティングプロバイダーに、サイトで永続的オブジェクトキャッシュを有効にできるかどうか確認してください
Ubuntuを例に説明します
以下の手順に従って、UbuntuにMemcachedをインストールします:
ターミナルを開き、以下のコマンドを実行してパッケージリストを更新します:
sudo apt update以下のコマンドを実行してMemcachedをインストールします:
sudo apt install memcachedMemcachedがインストールされたら、以下のコマンドを実行してステータスを確認できます:
sudo systemctl status memcached
Memcachedが起動していない場合は、以下のコマンドを実行して起動します:
sudo systemctl start memcachedデフォルトでは、Memcachedはlocalhostのポート11211でリッスンします。Memcachedを設定するには、/etc/memcached.confにある設定ファイルを編集します。
Memcachedをテストするには、以下のコマンドを実行してphp-memcached拡張機能をインストールします:
sudo apt install php-memcached
# follow your php version
sudo apt install php7.4-memcached
拡張機能がインストールされたら、以下のコードでPHPスクリプトを作成します:
<?php
$m = new Memcached();
$m->addServer('localhost', 11211);

$result = $m->get('test_key');
if ($result) {
    echo $result;
} else {
    echo 'No data found in cache. Adding some data now...';
    $m->set('test_key', 'Hello, world!', 10);
}このコードは新しいMemcachedインスタンスを作成し、localhost:11211にサーバーを追加し、キーtest_keyで値の取得を試みます。値が見つかった場合は表示されます。見つからない場合はメッセージが表示され、キーtest_keyでキャッシュに値が追加されます。
以下のコマンドを実行してPHPスクリプトを実行します:
php script.phpMemcachedが正しく動作していれば、「No data found in the cache. Adding some data now…」というメッセージが表示され、「Hello, world!」という値がキャッシュに追加されます。
WordPress用プラグインをインストールしましょう
プラグイン画面でMemcached Object Cacheを検索します
例として、LiteSpeed Cacheのインストールを取り上げます。
apache2サービスを再起動することを忘れないでください。
sudo apache2ctl restartこれでオンにすることができます。