In the previous Arduino tutorial, we learned how to control the on/off state of an LED. In this tutorial, we will learn how to control the brightness of an LED using Pulse Width Modulation (PWM) with Arduino.
The LED brightness is controlled by adjusting the duty cycle of the PWM signal. The duty cycle is the ratio of the time the signal is on to the total time of one cycle. The larger the duty cycle, the brighter the LED, and vice versa.
Step 1: Connect the Circuit
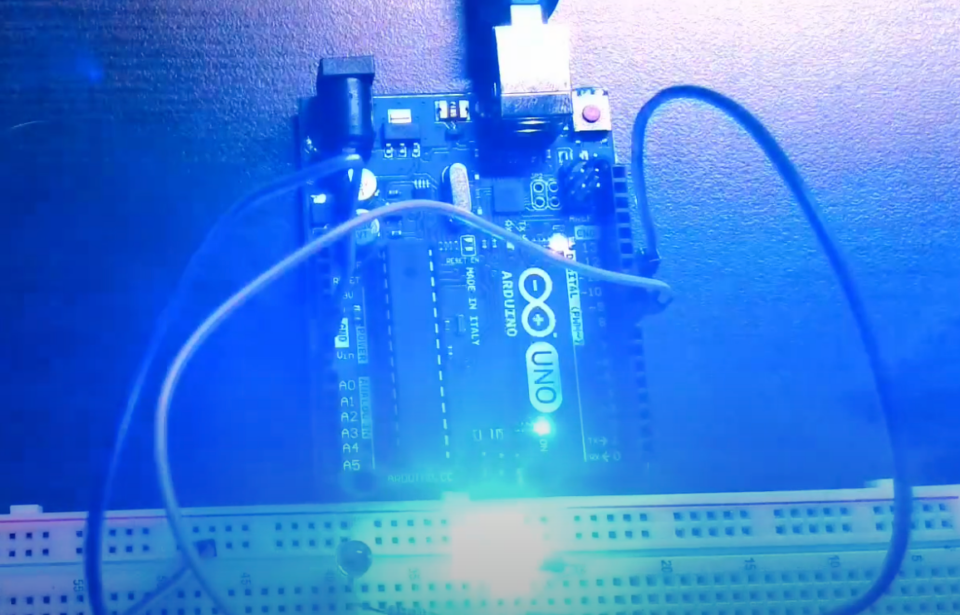
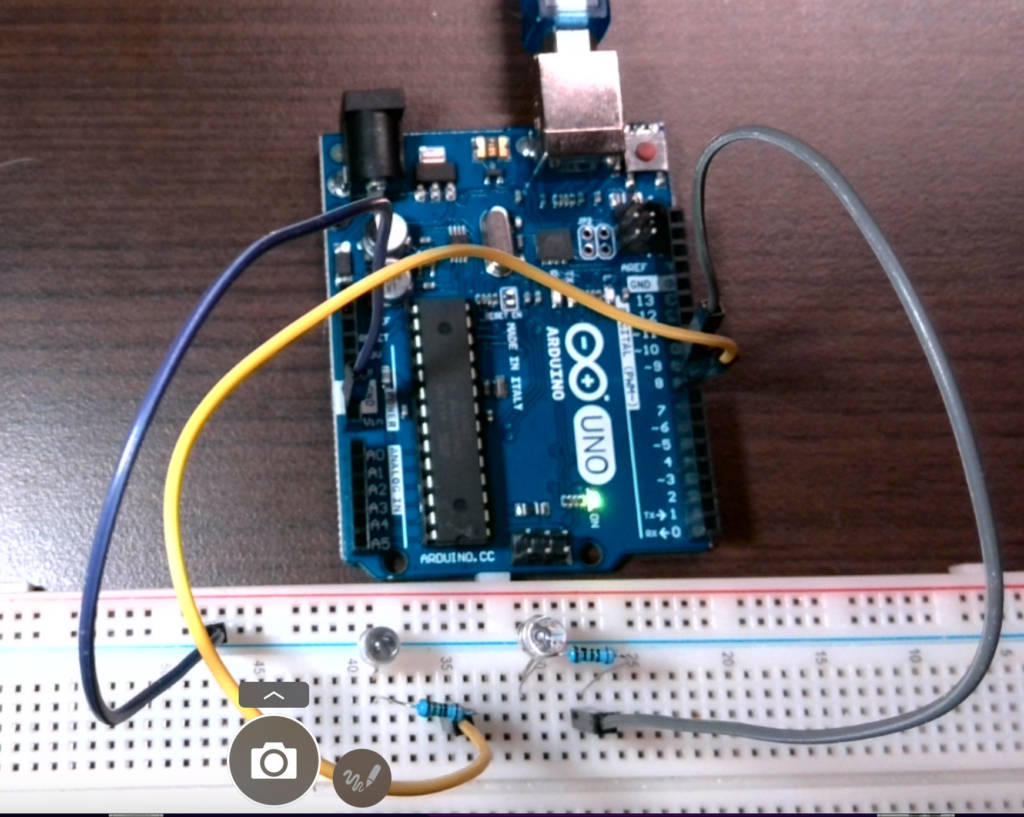
We will keep Pin 8 as a digital control circuit, and connect it to the red LED on the circuit. Another side, connect the anode of the LED to pin 9 of the Arduino. We use a 100-ohm resistor to protect the Arduino and LED. Connect the cathode of the LED to the ground.
Step 2: Write the Code
// the setup function runs once when you press reset or power the board
void setup() {
  // initialize digital pin LED_BUILTIN as an output.
  pinMode(8, OUTPUT);
  pinMode(9, OUTPUT);
}

// the loop function runs over and over again forever
void loop() {
  //red
  digitalWrite(8, HIGH);  // turn the LED on (HIGH is the voltage level)
  delay(1000);                      // wait for a second
  digitalWrite(8, LOW);   // turn the LED off by making the voltage LOW
  delay(1000);
  //blue                    // wait for a second
   for(int i=0; i<256; i++) // Increase brightness from 0 to 255
  {
    analogWrite(9, i); // Set the duty cycle to i
    delay(10); // Wait for 10ms
  }

  for(int i=255; i>=0; i--) // Decrease brightness from 255 to 0
  {
    analogWrite(9, i); // Set the duty cycle to i
    delay(10); // Wait for 10ms
  }

}
Step 3: Explanation of the Code
The code starts with the setup() function, where we set pin 8 and pin 9 as output using the pinMode() function.
In the loop() function, we use a for loop to increase the brightness of the LED from 0 to 255 by increasing the duty cycle of the PWM signal using the analogWrite() function. We wait for 10ms using the delay() function before moving to the next duty cycle.
After reaching the maximum brightness of 255, we use another for loop to decrease the brightness from 255 to 0 by decreasing the duty cycle of the PWM signal. Again, we wait for 10ms between each duty cycle.
Step 4: Upload and Test
Upload the code to your Arduino board and connect the circuit as described in Step 1. You should see the LED gradually getting brighter and then dimmer in a loop.
In conclusion
Learning how to control LED brightness using Pulse Width Modulation (PWM) is an important skill for any beginner in Arduino programming. By understanding the concept of the duty cycle and using the analogWrite() function, you can easily adjust the brightness of an LED according to your needs. With the simple circuit and code provided in this tutorial, you can start experimenting and creating your own LED projects with different levels of brightness. Whether you’re interested in robotics, or home automation, or just want to explore the world of electronics, mastering PWM will open up a world of possibilities for your Arduino projects.
English Version
In the previous Arduino tutorial, we learned how to control the on/off state of an LED. In this tutorial, we will learn how to control the brightness of an LED using Pulse Width Modulation (PWM) with Arduino.
The LED brightness is controlled by adjusting the duty cycle of the PWM signal. The duty cycle is the ratio of the time the signal is on to the total time of one cycle. The larger the duty cycle, the brighter the LED, and vice versa.
Step 1: Connect the Circuit
We will keep Pin 8 as a digital control circuit, and connect it to the red LED on the circuit. Another side, connect the anode of the LED to pin 9 of the Arduino. We use a 100-ohm resistor to protect the Arduino and LED. Connect the cathode of the LED to the ground.
Step 2: Write the Code
// the setup function runs once when you press reset or power the board
void setup() {
  // initialize digital pin LED_BUILTIN as an output.
  pinMode(8, OUTPUT);
  pinMode(9, OUTPUT);
}

// the loop function runs over and over again forever
void loop() {
  //red
  digitalWrite(8, HIGH);  // turn the LED on (HIGH is the voltage level)
  delay(1000);                      // wait for a second
  digitalWrite(8, LOW);   // turn the LED off by making the voltage LOW
  delay(1000);
  //blue                    // wait for a second
   for(int i=0; i<256; i++) // Increase brightness from 0 to 255
  {
    analogWrite(9, i); // Set the duty cycle to i
    delay(10); // Wait for 10ms
  }

  for(int i=255; i>=0; i--) // Decrease brightness from 255 to 0
  {
    analogWrite(9, i); // Set the duty cycle to i
    delay(10); // Wait for 10ms
  }

}
Step 3: Explanation of the Code
The code starts with the setup() function, where we set pin 8 and pin 9 as output using the pinMode() function.
In the loop() function, we use a for loop to increase the brightness of the LED from 0 to 255 by increasing the duty cycle of the PWM signal using the analogWrite() function. We wait for 10ms using the delay() function before moving to the next duty cycle.
After reaching the maximum brightness of 255, we use another for loop to decrease the brightness from 255 to 0 by decreasing the duty cycle of the PWM signal. Again, we wait for 10ms between each duty cycle.
Step 4: Upload and Test
Upload the code to your Arduino board and connect the circuit as described in Step 1. You should see the LED gradually getting brighter and then dimmer in a loop.
In conclusion
Learning how to control LED brightness using Pulse Width Modulation (PWM) is an important skill for any beginner in Arduino programming. By understanding the concept of the duty cycle and using the analogWrite() function, you can easily adjust the brightness of an LED according to your needs. With the simple circuit and code provided in this tutorial, you can start experimenting and creating your own LED projects with different levels of brightness. Whether you’re interested in robotics, or home automation, or just want to explore the world of electronics, mastering PWM will open up a world of possibilities for your Arduino projects.
日本語版
前回のArduinoチュートリアルでは、LEDのオン/オフを制御する方法を学びました。今回のチュートリアルでは、Arduinoでパルス幅変調(PWM)を使用してLEDの明るさを制御する方法を学びます。
LEDの明るさは、PWM信号のデューティサイクルを調整することで制御されます。デューティサイクルとは、信号がオンになっている時間と1サイクルの全体時間の比率です。デューティサイクルが大きいほどLEDは明るくなり、小さいほど暗くなります。
ステップ1:回路を接続する
ピン8をデジタル制御回路として維持し、回路上の赤色LEDに接続します。もう一方では、LEDのアノードをArduinoのピン9に接続します。ArduinoとLEDを保護するために100オームの抵抗を使用します。LEDのカソードをグランドに接続します。
ステップ2:コードを書く
// the setup function runs once when you press reset or power the board
void setup() {
  // initialize digital pin LED_BUILTIN as an output.
  pinMode(8, OUTPUT);
  pinMode(9, OUTPUT);
}

// the loop function runs over and over again forever
void loop() {
  //red
  digitalWrite(8, HIGH);  // turn the LED on (HIGH is the voltage level)
  delay(1000);                      // wait for a second
  digitalWrite(8, LOW);   // turn the LED off by making the voltage LOW
  delay(1000);
  //blue                    // wait for a second
   for(int i=0; i<256; i++) // Increase brightness from 0 to 255
  {
    analogWrite(9, i); // Set the duty cycle to i
    delay(10); // Wait for 10ms
  }

  for(int i=255; i>=0; i--) // Decrease brightness from 255 to 0
  {
    analogWrite(9, i); // Set the duty cycle to i
    delay(10); // Wait for 10ms
  }

}
ステップ3:コードの説明
コードはsetup()関数から始まり、pinMode()関数を使用してピン8とピン9を出力に設定します。
loop()関数では、forループを使用してanalogWrite()関数でPWM信号のデューティサイクルを増加させることにより、LEDの明るさを0から255まで上げます。次のデューティサイクルに移る前に、delay()関数を使用して10ミリ秒待機します。
最大輝度255に達した後、別のforループを使用してPWM信号のデューティサイクルを減少させることにより、明るさを255から0まで下げます。同様に、各デューティサイクル間で10ミリ秒待機します。
ステップ4:アップロードとテスト
コードをArduinoボードにアップロードし、ステップ1で説明した通りに回路を接続します。LEDが徐々に明るくなり、その後暗くなるのがループで繰り返されるのが確認できるはずです。
まとめ
パルス幅変調(PWM)を使用してLEDの明るさを制御する方法を学ぶことは、Arduinoプログラミング初心者にとって重要なスキルです。デューティサイクルの概念を理解し、analogWrite()関数を使用することで、必要に応じてLEDの明るさを簡単に調整できます。このチュートリアルで提供されたシンプルな回路とコードを使って、さまざまな明るさレベルのLEDプロジェクトを実験・作成し始めることができます。ロボット工学やホームオートメーションに興味がある方、あるいは単に電子工学の世界を探求したい方にとって、PWMをマスターすることはArduinoプロジェクトの可能性を大きく広げてくれるでしょう。